Ugly Christmas Sweater . . . Party of Two

Target you did it again!  Every time I step into Target I become more and more impressed.  The Visuals constantly improve, the store lay out, and the product.  A lot of the holiday decor this season is amazing, and if you have not been there to see it yet I suggest taking a trip before the Thanksgiving madness occurs. So on one of my MANY Target trips, I stumbled upon the most amazing thing ever!IMG_8221

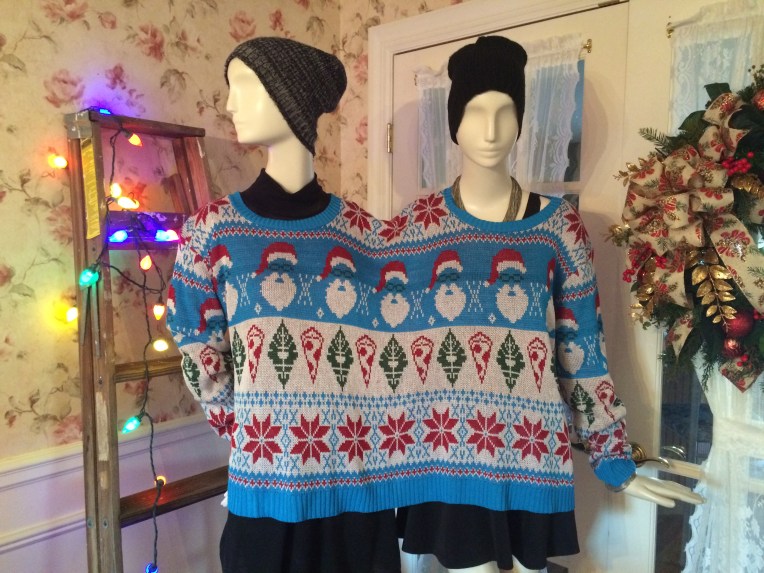
First off, we know Ugly Sweater parties are all the rage lately, and we thought it would be a quick trend that was going to last maybe a year? two? but they are still going strong and don’t seem to be going anywhere. Not that you don’t want to wear them every day of the season.  I am not one to go buy an ugly Christmas sweater at a big box store, but more on that later. This sweater is hanging on two hangers? and taking up a whole clothing wrack, and has Santa wearing very thick glasses, and what appears to be PIZZA?  I don’t think a second past before I unhooked both hangers and threw the sweater into my cart.  The only thing about this sweater that bothered me was that it was in the women’s section of target, which I obviously don’t shop on the daily, thank god it caught my eye from across the store.

My friend Megan and I started a tradition last year that we are going to buy an Ugly Sweater as a gift for each other every year (Megan, I know your going to read this post, so that cats out of the bag. This is obviously your Christmas present this year! Merry Christmas!)  We normally find the most unique sweaters we can find. Which brings us back to the big box store sweaters.  The fun of an Ugly Christmas Sweater is that they were sold in stores not that many years ago for your mom or grandma to wear, and I guess it was ok then?

I do remember buying  my mom one for Christmas one year. I believe she even asked for it.  I wasn’t of driving age at the time, so I asked my dad if he would take me to Kohl’s to buy mom a Christmas sweater (please note the absence of the word Ugly).  Would you know that when Ugly sweater became all the rage I ransacked her closet looking for it for a friend to borrow and she had thrown it away. Which I guess wasn’t completely a bad thing, being my mom would no longer be seen wearing it, but I needed it!

The best ugly christmas sweaters are the ones you stumble upon at the thrift store, but this doesn’t happen to often. My friends and I are convinced that one little old lady is going around buying every single one and making bank on Etsy or Ebay.  So if in store shopping isn’t going to work then I guess I have to go buy it on Ebay from the business savvy  grandma who took them all.

IMG_4397

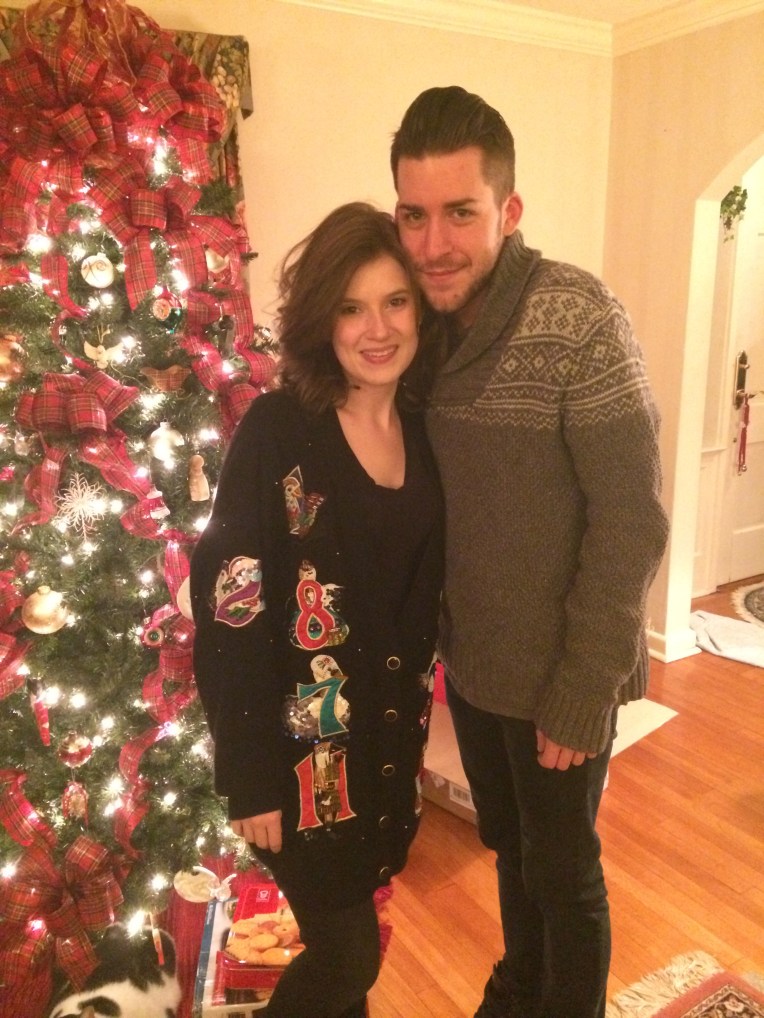
Last years Ugly Sweater was pretty amazing, counting down the 12 days of christmas with a lot of added notions. Buttons, Sequins, and ribbons galore.  Please note I am not wearing my ugly Christmas Sweater in this picture 🙂 .  My Ugly Christmas sweater gift from Megan didn’t come in the mail yet, but I couldn’t wait another day to give her hers.

So I guess this year I broke my own rule, but could you blame me??? A Ugly Christmas sweater that we can wear together, at the same time!  After a sweater test drive with my sister, the photo of it hanging flat on two hangers (still amazing) did not do the sweater itself much justice. So I took out two matching mannequins (yes, if you weren’t aware I do have a mannequin collection) and proceeded to dress the mannequins in this two armed, two head hole sweater.  I felt like I was dressing  Sarah Paulson as Bette and Dot from American Horror Story : Freak Show, making this sweater yet again amazing, and making me even happier that I bought it.  The only question is. . . what do you do with your other arm on the inside of the sweater?

IMG_8253

IMG_8251

Follow me On Bloglovin’


DIY: Saturday Craft Night with Your Best Friend!

So my friend Victoria sent me a text this week asking if I would assist her with a Holiday themed project. I obviously couldn’t say no, for multiple reasons, one it being Holiday themed, two the fact that she is one of my best friends, and Vickie’s projects usually involve paper. I can never resist a good paper project.

“I want to make an advent calendar” she stated in her text.  So my first thought was oh no! this may involve chocolate.  My only holiday memory involving an advent calendar was getting a shipment from my Grandma around the end of November, and like any child every year I had not a clue what she could possible be sending us in the mail….obviously a chocolate filled advent calendar. Thank god she wasn’t cheap and used her motherly instincts she also sent one for my brother and another for my sister, because we obviously each needed our own piece of chocolate before breakfast every single morning in the month of December.

A call after work hours cleared the whole chocolate part up.  She wanted to create an advent calendar using envelopes with holiday “tasks” for a family to complete (obviously a lot healthier then chocolate before breakfast, let alone every day).  She wanted to showcase a fun way to use envelopes for the holidays. We spoke about it every day for the rest of the week, and then came today….go time!

I raided my home stash, and pre cut Vinyl numbers, she had the envelopes we needed, and then came one of my favorite parts…shopping!  We went to the local craft store, luckily getting everything we needed in one stop.  Anticipating to use a coupon on our “VERY BIG” purchase, a frame that needed to be at least 17″x 22″, we were pleased to find that there were doorbuster sales, making the 24″ x 36″ frame 70% off, costing only $14.99!

Luckily with weekend crafting a glass of wine is allowed (not that I won’t do it on a weeknight every now and then).  So after only one glass of wine, no major crafting accidents, and a few hours this rather large advent calendar was complete!

IMG_8213 IMG_8189

I promised myself if I ever started a blog, in which I guess I decided to do 🙂 I would not list every little detail of the project and give every single step in chronological order.  Why? Well if you read this and decided you want to take on creating your own advent calendar it should be YOUR OWN.  I want this to inspire you to create, if you wanted yours to look exactly like mine you might as well just go to the store and buy one. The fun about crafting is that it has your own touches, and own ideas.  Also it would suck all of the fun out of it if I gave you the steps one by one, the best part about crafting is planning out your ideas and problem solving.

MATERIALS:

TOOLS:

  • Scissors
  • Hot Glue Gun
  • Ruler/Tape Measure
  • Spray Adhesive
  • Straight Edge
  • Exacto
  • Tape
  • Thin Ribbon/ String
  • Wine 🙂 (Optional of course)

IMG_8161 IMG_8163 IMG_8165

Unfortunately the paper that we fell in love with wasn’t big enough for our frame, so it had to be seamed.  Keep in mind, you can always cut your paper with a straight edge to make your patterns match up.  When pulling the paper from the rack in the store I made sure to get two pieces which matched up with out me having to cut them just to make it slightly easier.

IMG_8171

If you look closely you can see we taped the seam of the paper from the back so that when we laid it down after we sprayed the glue we did not have to worry about matching it up.  Also notice the hanging hardware on the back piece of MDF of the frame. We mounted the paper directly to it. In this step it may not matter but always keep note where your hardware is when laying out your calendar. Make sure everything is mounted in the correct orientation to match up which way you are going to hang it.

IMG_8172

The next part needed a little bit of thought and calculation. I took this part on while Vickie got do the fun stuff like sticking the numbers on the envelopes (which could also be hand written) and writing out family friendly holiday ideas to fill each envelope with.  I guess I partook in that slightly while we exchanged ideas for things that families can do together to enjoy the holidays.  We obviously also exchanged a few good laughs.

IMG_8179IMG_8205IMG_8176 IMG_8180 IMG_8181 IMG_8183

Originally I was going to measure out each of the clothes pins correct home and place a small pencil dot where it belonged. For some reason I thought it may be easier to use ribbon to make a grid.  With most of my projects I try to figure out the best way to overcome challenges with repetitive tasks.  Sometimes they work, sometimes they don’t :/ .  I think this one was a winner.  I measured out the space I had to place the envelopes, the size of the envelopes with the clothes pin, and with some basic mathematics, some thin ribbon, a ruler and scotch tape stuck to the counter the grid was born. A line of hot glue on the back of each clothes pin and now we are getting somewhere.

You will soon come to learn that this would not have been a Tis A Season creation if it didn’t have some ribbon on it. Let’s be real that not everything needs ribbon, but what can I say, I have a problem.  So this may have been the most tedious part of the project, but I think added that extra charm it needed.

IMG_8184

Twenty four hand tied bows, it could be worse, and it has been, so it was doable. You can also use the fork tying bow method, which if you have not seen it already it can be easily googled. Which I did try one that way, but it was way to perfect, which was the look I thought I was going for….but it wasn’t.

We placed the whole thing back into the frame, we hot glued the bows on and “pined” in all of the envelopes.  As soon as the frame went on and that first envelope got put into its place it took on a whole new look and really brought it all together. IMG_8189 IMG_8192 IMG_8191 IMG_8196

IF I DID IT AGAIN:

We chose the foiled poster board cause we really liked the print, but if I did it again I probably would have found paper large enough to fit the frame with out having to seam it, most likely wrapping paper. The seam stands out more in the photos then it does in person, but me being me it will bother me every time I look at it.


Follow me On Bloglovin’