Sooo it has been a very, very long time since the last post. There are too many reasons to list why it’s been this long and I clearly do not want to bore you, but to sum it up very quickly…Holiday Installs, Family Medical Issues, Sprained Ankle, Holiday Take Down, Huge Bar Mitzvah with a lot of Decor and Costumes…..and It’s February. That sums it up in one quick sentence. To think that I can sum up the last 2 months of my life that quickly is slightly sad, but I guess those are the main points, 3,000,000 other things happened as well.
This project your about to see was planned to occur before the holiday season, but it never happened, so here it is for your enjoyment, or maybe just mine. 🙂
There are certain prints I just wish would be in style forever and ever, Harlequin being one. There is just something about the Diamond print and the high contrast that I feel adds the right amount of fun and whimsical flare to any project. The top 3 prints that I gravitate towards, whether it be a Wreath, a Tree, a Invitation, an Event etc. etc. are as follows, Harlequin (clearly), Damask, and Chevron. As a designer I question if it’s “In Style” to add these prints to my many endeavors, but at the end of the day in DIY it’s up to you to do as you wish, so never be afraid to do what you love.
I found this amazing Harlequin tissue paper. It was a little more expensive then I would have liked, being that I had seen candles like this for sale in a harlequin print but would never spend the price they were asking, the tissue paper with all the other necessities for this project was still way cheaper then the already made candles, and taking on this project was clearly more fun!
During High School I attended a Fashion design half day program where I learned to Sew, construct garments, create fashion renderings, and pattern making. I bring this up for the most random of reasons, but don’t fret, this project did not involve sewing of any kind. In class we learned to sew with store bought sewing patterns. These patterns were printed on tissue paper, and we were taught to Iron the pattern before we cut it so any creases or wrinkles would disappear.
This applies perfectly to our project. Before cutting the tissue paper down to the size of the candle, I lowered my iron to the lowest heat setting and turned the steam completely off. The tissue paper came with some lovely fold lines, which I easily ironed away.
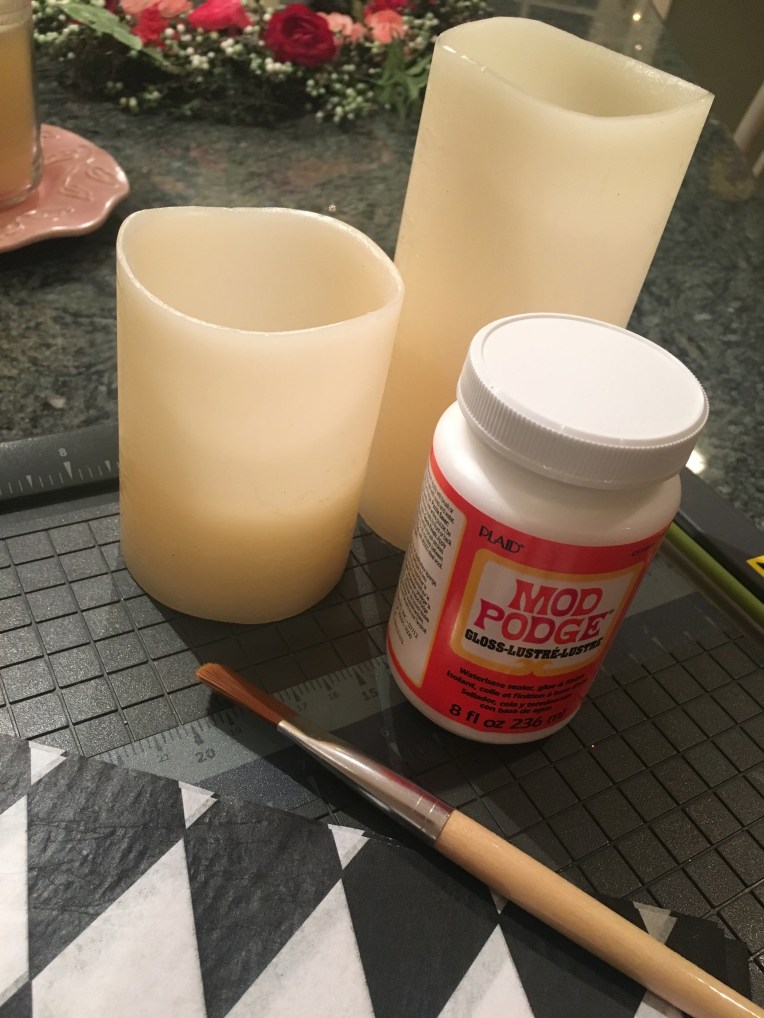
Shockingly I do not use Mod Podge as much as I think I should, as it was not something my parents graced me with growing up. This was probably because if I knew it existed as a child every wall and item in my house would be modged with something, glitter, newspaper, or tissue paper. I precut my tissue paper with an extra 1/2″ on the length and the height and no I was not overly meticulous about the pattern matching up on the seam. 
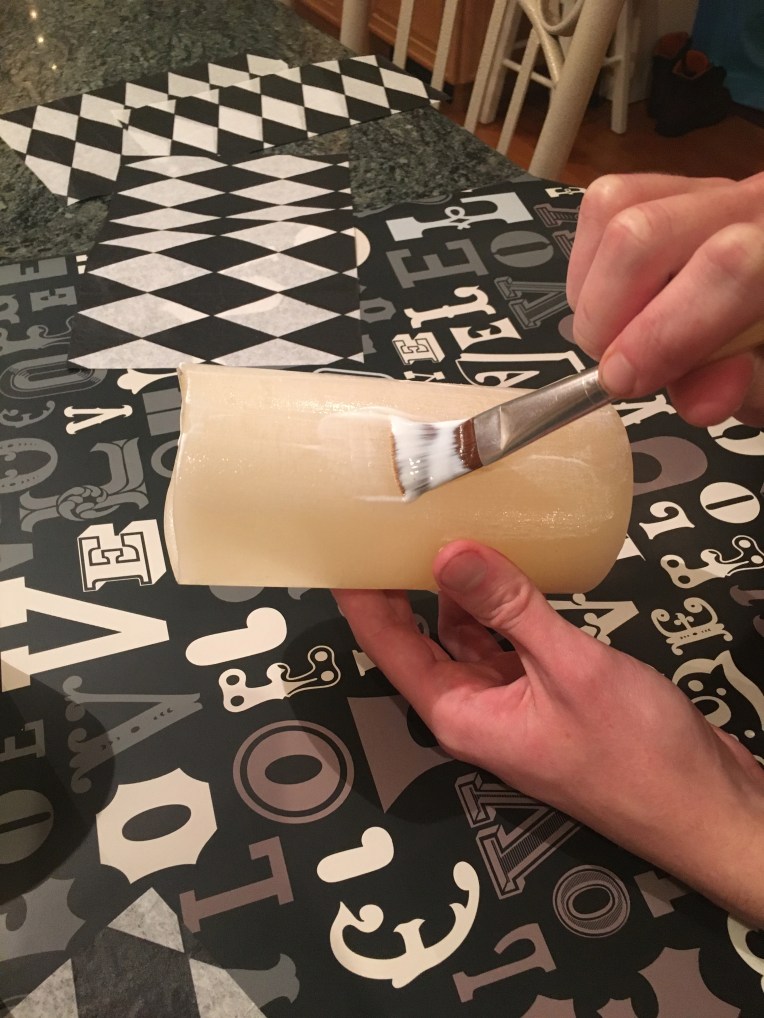

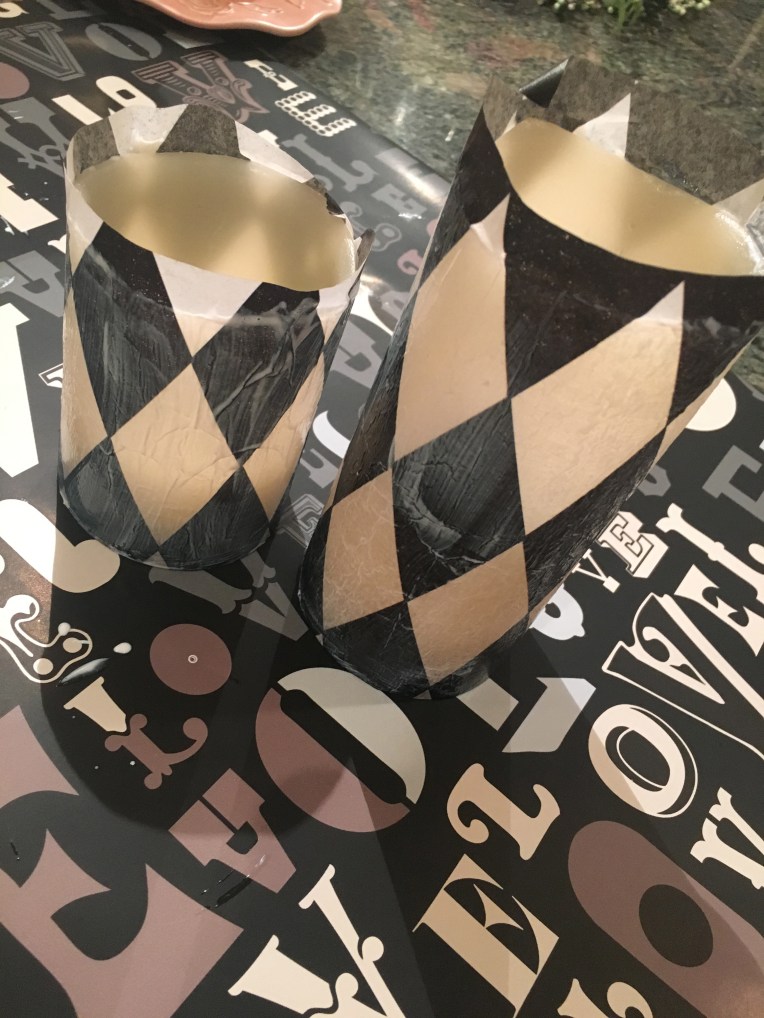
I applied one coat of modge, then the tissue, then another coat. I let that dry and then applied one more coat, then I let that dry….Great thing is with Mod Podge it doesn’t take that long to dry. Once the second top coat was dry I took a brand new exacto blade and trimmed the excess tissue paper to the curving lines of the top of the candle. (Always cut away from your hand!(No I did not have a exacto accident on this project 🙂 ) )

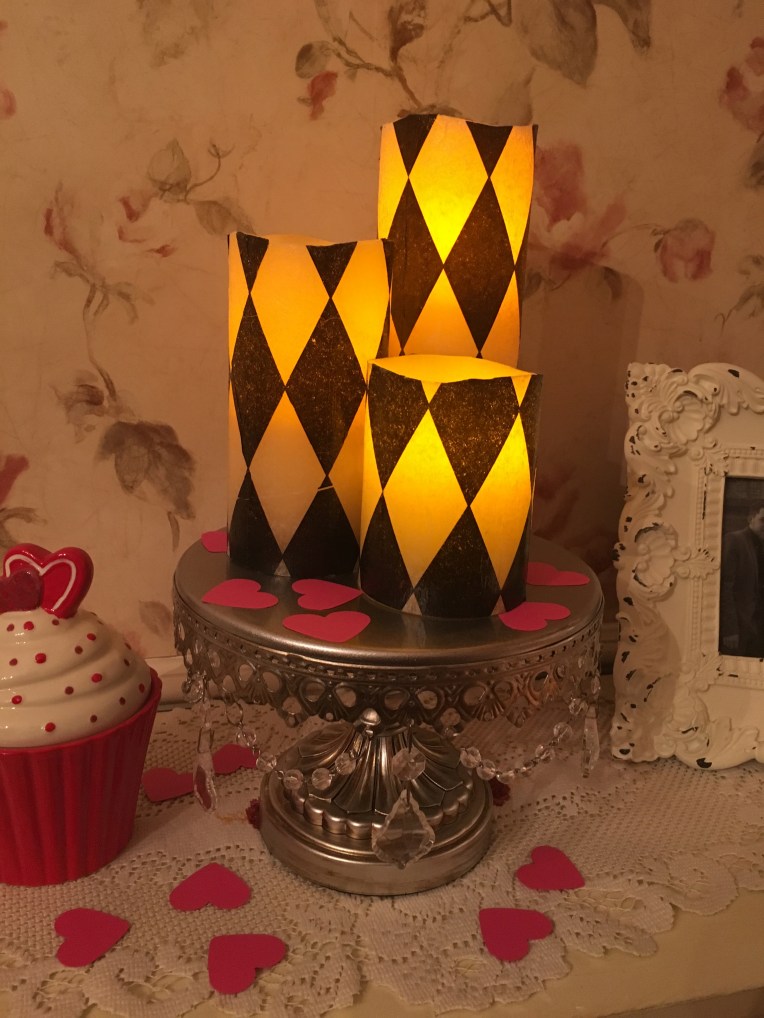
I think the best part about making something is being able to enjoy it, the hard yet fun part is over. It is like unpacking an Etsy or Ebay purchase when it arrives at your door. It brings you complete happiness, except this time YOU made it
I love them! I am really happy with the way these candles turned out. I love them for Valentines day, I love them for Easter, I love them even more for Halloween, and even Christmas. I love them for every day, but I think I will put them away after Easter and take them back out at Halloween.
As my list of craft project grow, and years go by I have began to notice something. Sometimes as you are crafting you are overly critical of our own work. When you pull it back out you look at it differently. You see it in a new light. Maybe what you thought was an imperfection upon creating it now adds character. What you may have seen as a flaw or something you questioned makes the item special.
Hopefully this has inspired you to take out your modge and start podging, because now I foresee more Mod Podge projects in the near future. 🙂
